Bunny pictures from hand stamp


I did this fun bunny craft with the kids at the preschool last week in preparation for Easter. Every single one is just sooo adorable in my opinion that it was next to impossible to leave any out! Check out their individual pictures below!


What did you think? Pretty sweet! Right? I love that each of these bunny pictures truly reflected the kids who made them — unique and beautiful, just like they are.

I credit my son with this craft, as it was he who looked up at his snowman craft on the refrigerator, and said, "I want to make an Easter bunny craft like that, but instead of the snow, we should make grass, and instead of the snowman, a bunny." I was so excited and impressed. Ever since we have started doing craft projects on a more regular basis, I've noticed Bode start thinking about, and coming up with activities and crafts for us to do.  I LOVE when I witness his mind being creative like this! AND I am a HUGE advocate of following my child's lead. There is no positive reinforcement like that of than validating another person's idea, supporting it and seeing it through to fruition.

I applied the same principles to the bunny picture as I did to the snowman picture (torn ground & circle shapes). And with the picture that I did at home with my son, we also used a hole punch to punch out colored paper to represent falling blossoms.
Here is the step by step tutorial:

Materials used:
  • half sheet of construction paper in a light color. I had the kids choose either pink, yellow, or light blue to represent the pastel colors of Easter
  • Circles cut out of white paper; 2 circles each in the following diameters: 1.25" (for head), 1.75" (for body)
  • green construction paper for the grass
  • white tempera paint
  • paint brush
  • scissors
  • Glue stick
  • marker to draw face
  • hole punch (optional)

Step one: Paint middle finger, pointer finger and thumb white.
Step Two: Press hand down on OPPOSITE side of background paper! (if you painted the left hand, press it down on the right hand side! And/or vice versa!)
One set of bunny ears and tail done!
Step Three: Paint the other hand and press it down on the opposite side as well.
Step four: Position and glue down circles for head and body
Step Five: Do the same for the other bunny
Step Six: Have child rip and glue on green construction paper at bottom of the page for grass. Position it so it looks like the bunnies are sitting in the grass.
Step Seven: Turn over paper and cut off excess green paper if there is any.
Step Eight: Have child draw on faces! This is the step where the project was complete at the preschool. I did a few more steps with my son when we did the project at home though. See below.
Step Nine: Have child punch out paper in flower blossom colors. We were going for cherry blossoms so we used pink.
Step Ten: Glue down colored dots.
Instead of the snow falling from the sky as we did in the Snowman project, I thought it would be cute to have the cherry blossoms falling down instead, to represent Spring. My son refused to have them be "cherry blossoms" and insisted that they must be cherries. And so he drew cherry stems :)
If you liked this post and you want to stay informed of more kid activity ideas I post or find around the blogosphere, remember to "like" me on my Facebook Page! Thank you! Have a wonderful day!

Happy crafting! 

Pin It!

Handprint lambs with packing peanuts

Knowing that Easter is right around the corner, I decided to get festive and have my son make a little "Easter" art to hang around the house. I had seen the cute little lamb crafts circulating around the internet with a child's handprint and cotton balls (Check it out here). I've also seen some pretty amazing ones around made with other common household materials, like hole reinforcers (check it out here) and then most recently found lambs made with cotton rounds (check it out here). Last week, I scored a bag full of packing peanuts from MECCA, our local store that saves materials from the landfill, puts them back into circulation and into the hands of crafters/teachers like me (who are working on a shoestring budget). I thought that we ought to try using these peanuts for the lamb's coat, because, after all, what could beat recycled material and free?


First I painted my son's hand and pressed it down on a piece of paper.


My son then glued down the packing peanuts onto the "body" of the sheep.


He then glued down a googly eye. We got these unique-looking googly eyes from Discount School Supply.


He then drew on ears and a tail with marker.


The final product. A pretty cute little lambie I think!


He also made a rainbow sheep for no other reason than just because we found these colorful packing peanuts in the bag. He, of course being the awesomely creative kid he is, couldn't resist using them; and really who could blame him? I love the way it turned out. I like to think of it as not exactly the "black sheep" of the family but the "Rastafarian hippie sheep".

If you liked this post and you want to stay informed of more kid activity ideas I post or find around the blogosphere, remember to "like" me on my Facebook Page! Thank you! Have a wonderful day!
Have a good weekend!

Pin It!

Ode to a Plum Tree


Two days ago was the first day of Spring. I had noticed the signs coming on for awhile. Crocuses and daffodils poking up from the thawing soil, with their flowery heads opening as if to say "hi"; drowsy bees stumbling out of their wintery sleep half-awake; and the plum trees — wow-the-plum-trees! — with their spectacular show of abundant pink blossoms lining our streets. How impossible it would be not to notice these harbingers of Spring!

So it was with quite dismay, but also with excitement and jubilance that we greeted Day #2 of Spring. When we awoke and looked out our windows all we could see was a thick! blanket of snow in every direction (an unusual occurrence at any time of year in our town, not to mention late March!). Schools were cancelled, snowmen were built, snowball fights were had, and hot cocoa sipped.

Now it is Day #3. Streets are clear of ice and snow. We went back to work & back to school, re-emerging mid-week as if it was a Monday. However since we knew we only had a day more until the weekend, there was a sense of relief felt, instead of the stress that a Monday brings.

Driving home and witnessing the snowstorms aftermath, it became apparent that not all living things fared well from the tardy wintery weather. Every single plum tree was split, and their blossom-covered limbs lay sadly around their base awaiting clean up. They just could not withstand the weight of the snow, and snapped under the pressure. It was really a disheartening sight.

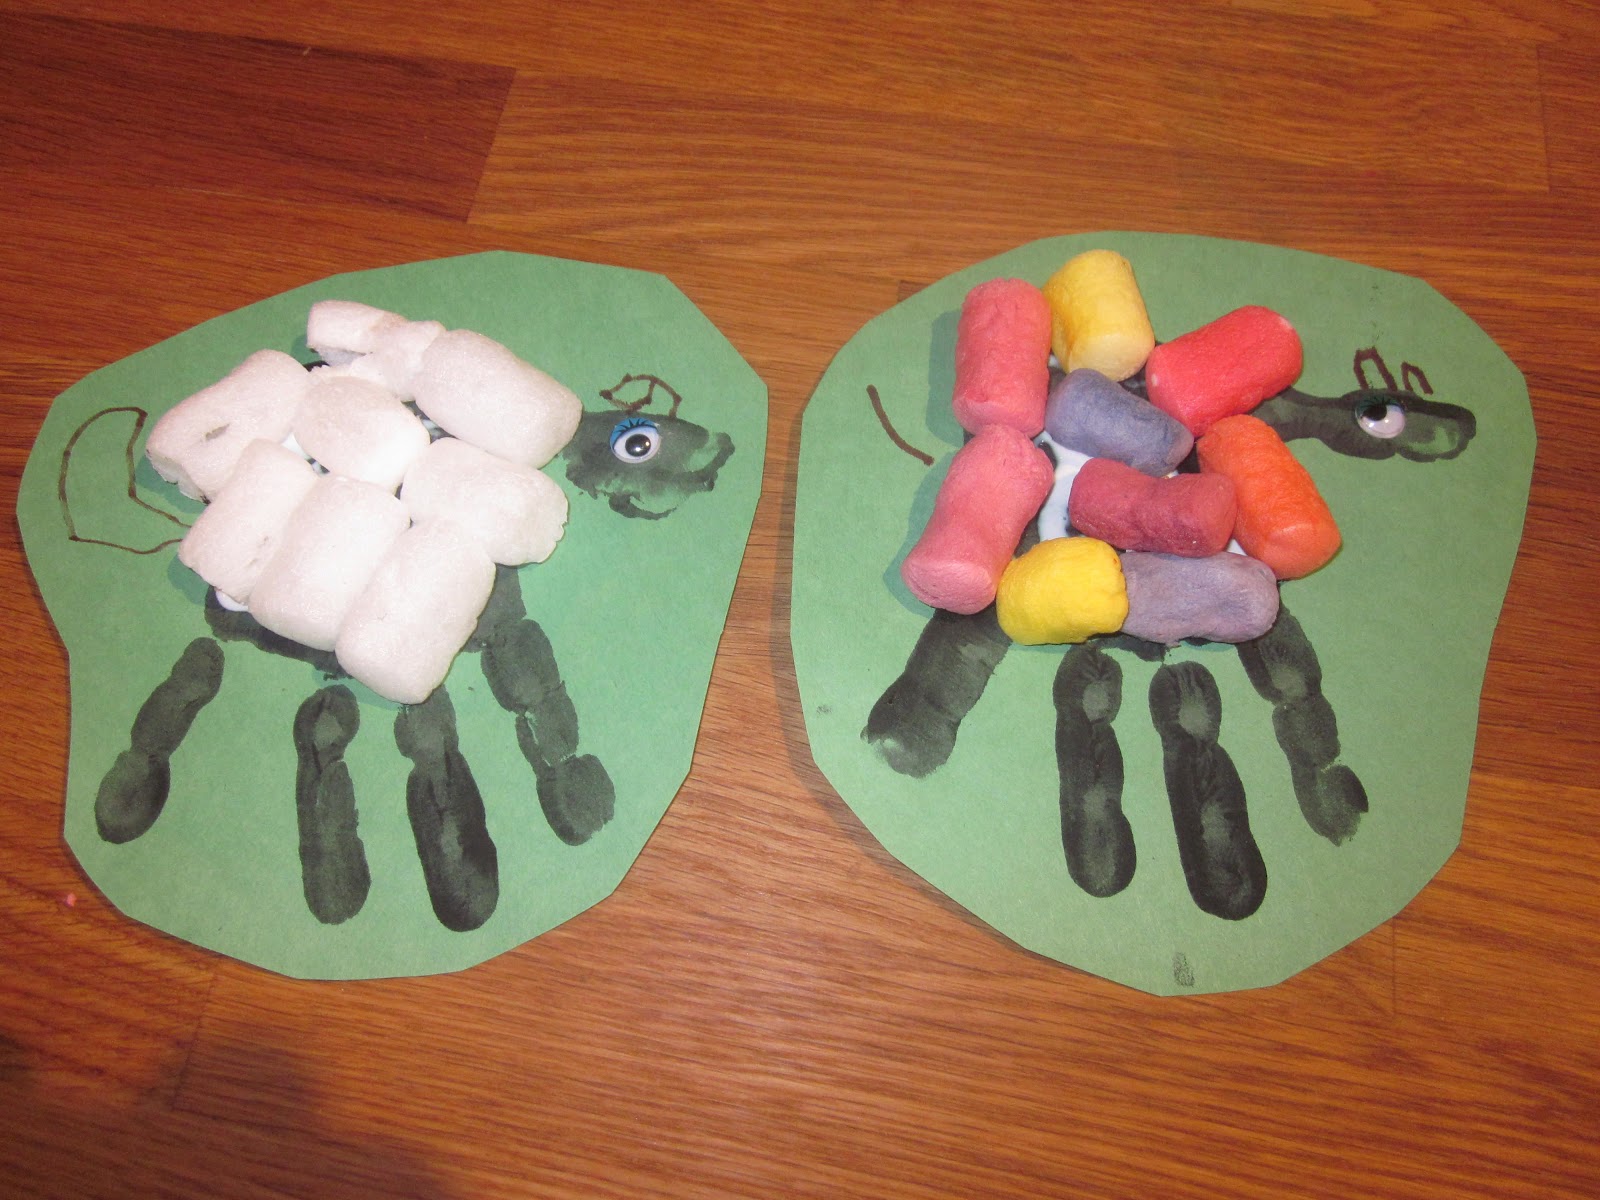
From it, though, this craft was born: "Ode to a Plum Tree" — a celebration of Spring —  yes — but also a tribute of all those trees with their downed limbs. Next time our town will be all the wiser, and will be whacking that snow out of those trees early on!

I did this project as a joint activity with my son, as sometimes I think it is just more enjoyable for him to have his mama on board.


Materials used:
  • Yellow, light blue, and green tissue paper cut in squares
  • Bright pink tissue paper, larger pieces cut and crumpled up
  • a square of mat board 
  • Pencil
  • brown construction paper
  • Sta-Flo liquid starch
  • paint brush
  • glue


I drew a circle for the sun with a pencil. We then covered the board with the liquid starch and pressed tissue paper squares down, yellow for the sun and blue for the sky, in their respective places. I encouraged overlapping, and we periodically painted more liquid starch on top to flatten the paper down.


I outlined my son's arm and hand on brown construction paper. I cut it out. I had him glue it down on the board.


We then pressed crumpled up pink tissue paper onto glue that was dotted all around the tree.


For the last step, we put green tissue paper grass on the bottom.

All done! A pretty display to hang in his room!
If you liked this post and you want to stay informed of more kid activity ideas I post or find around the blogosphere, remember to "like" me on my Facebook Page! Thank you! Have a wonderful day!

Pin It!

Science Activity: Blowing up a balloon using baking soda and vinegar


My son is so into making vinegar and baking soda volcanoes. We have made these a few times. Today he was begging me to make one again. This time, I thought that maybe we could try something different that would be equally as cool AND we could still use the same basic ingredients. This is an easy activity to do using simple materials and ingredients found in your kitchen, and the results are pretty fascinating (especially for a 4 year old).


Materials that we used:
  • balloon
  • funnel
  • empty water bottle
  • white vinegar
  • baking soda 
  • skewer 
  • 3/4 cup measure


1. I had my son pour about 3/4 cup of vinegar into the bottle using the funnel.

2. After rinsing out the funnel, I poured baking soda into the balloon, filling it up. Make sure you stretch out the balloon first! I used the funnel and a skewer as tools to aid the process (see picture above).


3. I carefully sealed the opening of the balloon onto the bottle. I made sure the contents of the balloon didn't spill into the bottle during this step.


4. I then held the balloon up, while shaking the contents down into the balloon. Immediately the 2 ingredients formed a chemical reaction, releasing a gas, and the balloon started to inflate.


Bode thought it was so cool and wanted to do it again, and again!


Points I highlighted with him (keeping it simple for a 4 year old):
  • When vinegar and baking soda are mixed together they create what is called a chemical reaction.
  • A gas is formed (carbon dioxide) which takes up more space than the vinegar and baking soda. That is why the balloon inflates. 
Other points to share if doing this experiment with older children:
  • The baking soda is a base while the vinegar is an acid.  (See here for a definition and examples of other bases and acids)
  • When vinegar and baking soda react together they form "carbonic acid".  Carbonic Acid is very unstable and it instantly breaks apart into water and carbon dioxide. Fizzing is what happens when the water and carbon dioxide escape the solution.  
Have fun!
If you liked this post and you want to stay informed of more kid activity ideas I post or find around the blogosphere, remember to "like" me on my Facebook Page! Thank you! Have a wonderful day!

Pin It!

Make an Easter Bunny Card from child's hand tracing

Hand-drawn bunny face graces front of card

When the card is opened, the card reads "SOME BUNNY LOVES YOU!" How sweet is that?!


SOOOO, I was just informed that Easter is just around the corner! WOW! April 8th this year...Made me feel that I had to get on it! Good thing I had something already up my sleeve — an inadvertent craft I kind of stumbled upon weeks ago.

At the preschool one day actually last month, some of the kids were stamping away, exploring and discovering the ever-changing rubber stamp collection we have there.  I happened to look over at one of the children stamping and saw on his paper a cute little bunny picture and the words  "Some Bunny loves you". In a flash this bunny card craft came to me.

Materials:
  • Construction paper in a light color
  • pencil
  • Googly eyes
  • Markers
  • Scissors 
  • Glue
  1. I traced the boy's left hand with a pencil (back of hand resting on page, palm facing ceiling) as he formed a peace sign (or "bunny ears"). Note The tracing was done on the right side of the construction paper so that I was able to fold paper as described in next step.
  2. I then folded the paper like a card (keeping the outline of hand on the "front of the card"). I folded the paper so that the top left edge of his pointer finger and the left edge of his hand was represented by the fold. 
  3. Then I cut the shape out through both layers of paper (cutting slightly inside hand tracing mark so the pencil marks can't be seen in final product). I had the boy glue googly eyes and draw a face on the front with markers
  4. In the inside I had him stamp the bunny and sentiment. Because I realize that most people don't have this specific stamp, you could instead save the below image to your computer — control click (MAC) or right click (Windows) — reduce the size so it is about 1.5 inches across & print out. Then cut it out, and  glue to inside of card.
  5. Voila! All done!

I thought to myself that I would have to remember this simple but precious craft come Easter time! It is sure to warm any recipient's heart :)


If you liked this post and you want to stay informed of more kid activity ideas I post or find around the blogosphere, remember to "like" me on my Facebook Page! Thank you! Have a wonderful day!

Pin It!

Adventures in Shaving Cream

OR "A Photo-documentary of a boy and a can of shaving cream gone wild".

Need I say more?

Contemplating about the best way to "dive in"

"Oh yeah!"

I added blue, yellow and red watercolor to keep it interesting (not that it was necessary!)

Feeling the squishiness in his hands

"Thank you Mommy for letting me do this!"

Lathering up!

"Yummy, if only it was whipped cream and I could eat it!

Oh man! He's past the point of no return. If this picture had audio, you would hear me yelling "Start the bath water!"

Um, it's not shampoo honey!

Making his best monster face!

Very soon after this last picture, I carried him — holding his body as far out in front of me as possible — to the bath tub and plunked him down into the warm water. A messy, messy, messy activity, but SOOOOOOO well worth it!
If you liked this post and you want to stay informed of more kid activity ideas I post or find around the blogosphere, remember to "like" me on my Facebook Page! Thank you! Have a wonderful day!

Pin It!